
CR records exposure on a PSP cassette, which must go through a reader before the image can be reviewed. DR captures the exposure with a flat-panel detector, so image confirmation sits closer to the exam room, workstation, or bedside. For the facility, the real difference is the post-exposure route: CR keeps cassette handling and reader processing in the workflow; DR shortens the path from acquisition to review.
Image confirmation after exposure has to be fast enough to support the next positioning decision, bedside check, or reporting step. A low-volume imaging room with a nearby CR reader may still work well. But when a shared reader, urgent bedside exams, repeated positioning checks, or PACS/RIS reporting pressure delays image confirmation, the next view, bedside decision, or report also moves later. That delay is the reason to compare DR configurations before the next upgrade decision.
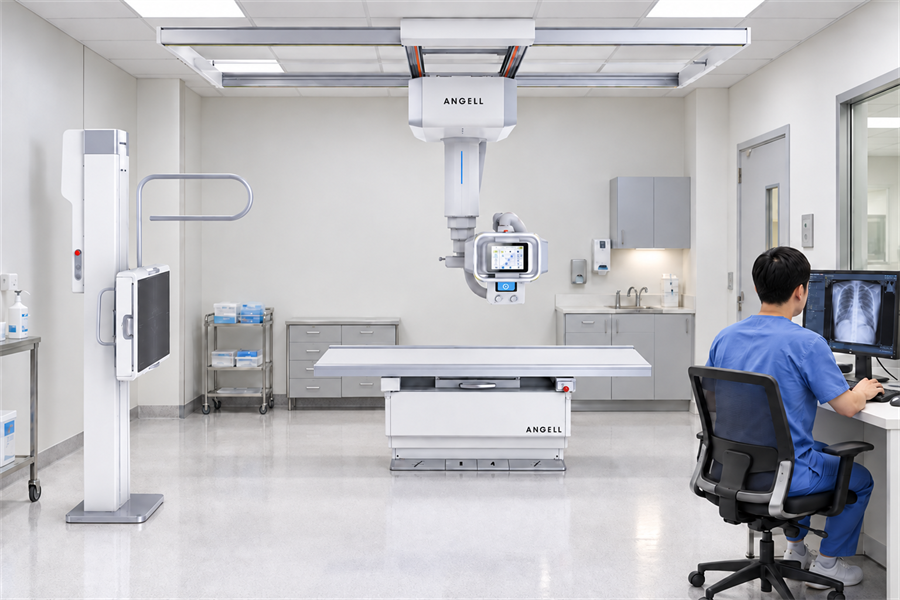
DR and CR Systems Compared by Imaging Workflow, Speed, Dose, Cost, and Maintenance
The table below compares what happens after exposure, where CR and DR create different delays for the room. With CR, cassette travel and reader processing can hold back image confirmation, repositioning, and PACS/RIS handoff. With DR, image review sits closer to the detector, workstation, or bedside, so the next view, bedside check, or reporting step can move sooner.
| Comparison factor | CR system | DR system | Practical meaning for buyers |
|---|---|---|---|
| Image capture | Uses a PSP cassette to store the latent image | Uses a flat-panel detector to capture the image directly | DR removes the plate-reading stage |
| After exposure | Cassette is carried to a CR reader, scanned, erased, and reused | Image appears at the workstation after detector readout | The technologist spends less time moving between room and reader |
| Image confirmation | Delayed when the CR reader is outside the exam room | Faster review near the point of care | Positioning errors can be found sooner |
| PACS/RIS flow | Digital transfer starts after the reader process | Digital transfer can begin closer to acquisition | DR can shorten the path from exposure to reporting |
| Dose feedback | Exposure data may be reviewed later in the workflow | EI/DI and exposure feedback can be tied closer to the exam | Closer exposure feedback supports repeat-image review and dose-drift checks |
| Image consistency | Influenced by plate condition, reader care, exposure choice, and processing | Influenced by detector calibration, protocol design, AEC setup, and processing | Plate care, detector calibration, and protocol review still shape consistency |
| Entry cost | May be lower when existing CR equipment remains in service | Includes detector, workstation, integration, installation, and service scope | Compare retrofit scope and operating cost |
| Maintenance focus | Plates, reader, cassette handling, and erasing process | Detector calibration, software, generator communication, and service response | The maintenance model changes after upgrade |
| Strongest fit | Low-volume rooms, phased budgets, stable routine work | High-volume rooms, bedside imaging, emergency use, R/F suites, PACS-driven departments | Reader distance, bedside confirmation, and PACS handoff decide the value |
One workflow study in The Bangkok Medical Journal compared routine checkup chest PA examinations and reported total procedure times of 86.2-96.2 seconds for CR and 17.6-19.5 seconds for wireless flat-panel DR. The result comes from one exam type and one workflow, so it should not be treated as a universal speed claim. It still gives a useful reference for rooms where cassette reading, shared CR readers, or reader location adds time before image confirmation and room reset.
Dose review also changes after a facility moves to DR. AAPM Report No. 116 explains that digital radiography can produce acceptable image appearance across a broad exposure range because brightness and contrast may be shaped by post-processing. Overexposure and underexposure may be hard to judge from image appearance alone. A CR-to-DR plan therefore needs exposure-index review, AEC calibration, collimation checks, and repeat-image tracking before the room goes live.
Product Selection by Clinical Workflow and Facility Need
Product selection follows the room’s bottleneck: cassette travel, patient movement, bedside confirmation, fluoroscopy, or loaded orthopedic assessment.
High-Volume Radiology Departments
In high-volume radiology rooms, small delays after each exposure can build into longer exam queues. Our QOMO Series supports faster room turnover with ceiling-mounted movement, dynamic and static detector switching, millisecond-level selection, and near-ground imaging for lower-limb views. It is a stronger fit when repeated views, repositioning, and image confirmation need to happen without slowing the next patient or the next view.
Emergency and Bedside Imaging
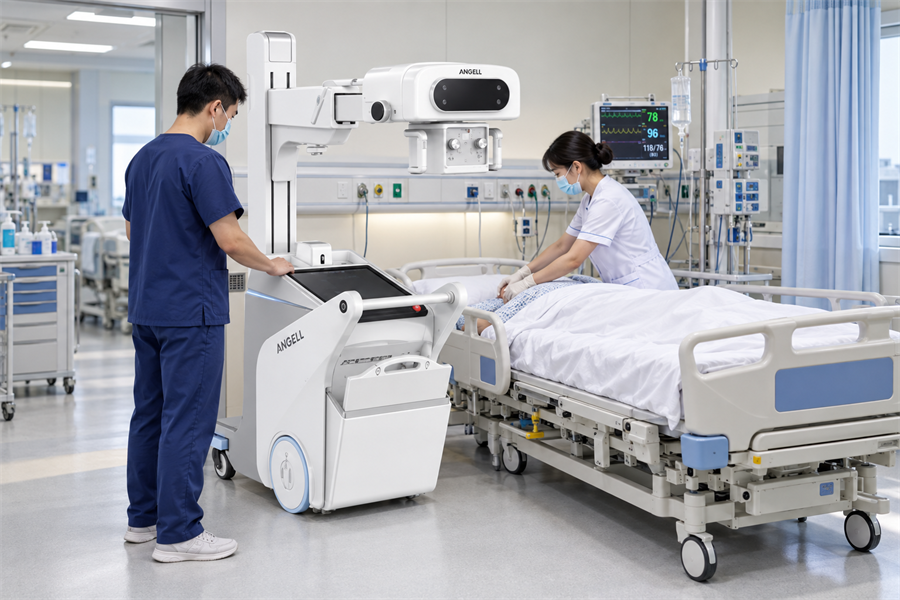
Emergency and bedside imaging depends on route access as much as image quality. The mobile system must reach the patient, position safely in confined spaces, and confirm the image without disrupting care. Our Lingxi Series supports this workflow with one-handed operation, 13-degree incline capability, dynamic observation, and high-resolution imaging for checks such as PICC and endotracheal intubation verification. Corridor width, elevator access, ward layout, and ICU bedside space should guide configuration selection.
Orthopedic and Multi-Position Imaging
In orthopedic imaging, the challenge is often how to obtain each projection without repeatedly moving the patient. For oblique, standing, table, or trauma-position views, our UC-ARM Dynamic DR System rotates the detector and horizontal arm together, keeping tube-detector alignment while the patient remains in position. This positioning logic serves a different need from a routine fixed-room DR upgrade, where the main goal is usually faster image acquisition.
Our WR-3D is used when orthopedic teams need standing 3D images of the spine, full lower limbs, hip, knee, or ankle while the patient is bearing weight. This is a different planning question from a basic CR-to-DR room upgrade.
Digital R/F Rooms for Radiography and Fluoroscopy
If fluoroscopy is only occasional, a standard DR room may be enough. Our Digital R/F Table System fits departments where fluoroscopy, contrast studies, full-length stitching, and routine radiography are part of the regular workload. Its dynamic flat-panel detector supports gastrointestinal studies, routine views, full-length imaging, and low-dose pediatric or gynecological work in one room.
At Cotabato Regional and Medical Center, we installed WR-3D with a Dynamic Remote R/F Table on August 7, 2025. The project combined 17×17-inch digital fluoroscopy with a 0.8-second switch between fluoroscopy and radiography. It shows how R/F and orthopedic imaging can be planned in one installation, while final configuration still depends on the selected model, room layout, integration route, and local clinical requirements.
Small Clinics and Budget-Limited Upgrades
Low-volume outpatient rooms can keep CR when the reader is nearby, repeat images are controlled, and cassette handling does not delay reporting or care. A phased DR upgrade becomes easier to justify when shared-reader use, patient waiting, urgent image checks, or planned exam growth starts to slow the daily route. The decision should compare the cost of continued CR use with the room changes, integration work, and service scope required for DR.
CR vs DR System Selection: When to Keep CR and When to Upgrade to DR
A CR room can stay in service when exams move on time, the reader is close, and image confirmation does not hold up care. DR becomes worth comparing when reader travel, image checks, reporting handoff, or planned exam growth starts to slow the room. The table below separates rooms that can keep CR for now from rooms that should start planning a DR upgrade.
| Decision area | Keep CR for now | Move toward DR |
|---|---|---|
| Daily workload | Low exam count and stable appointment flow | Queue pressure, high outpatient volume, or frequent urgent exams |
| Reader location | CR reader is close and does not slow the room | Technologists lose time walking between room and reader |
| Image review | Delayed confirmation does not affect care | Fast confirmation is needed before the patient leaves or bedside care continues |
| PACS/RIS handoff | Reporting flow remains acceptable | Digital worklist, image transfer, and reporting speed need tighter integration |
| Dose review | QA process already controls repeats and exposure drift | EI/DI review, AEC calibration, and repeat analysis need stronger visibility |
| Service planning | Plate and reader maintenance are manageable | Facility wants detector calibration, software support, training, and system-level service |
| Room future | Demand is stable | The room may support more exams, new departments, or expanded clinical use |
After the room’s delay points and upgrade needs are clear, we can help match the room with a practical DR configuration. Our experience in digital medical imaging since 2002, together with R&D work across detectors, generators, DR platforms, and image acquisition software, helps us review the room plan against real installation needs.
Key Questions Before Replacing CR With DR
Patient Volume and Room Throughput
Before replacing CR with DR, the facility first has to know whether the current CR workflow can keep up with the room’s daily exam load. Average exams per day, peak-hour backlog, repeat-image rate, and the time from exposure to confirmed image show where pressure appears. Reader location belongs with these numbers because a nearby reader and a shared reader can create different delays at the same exam volume.
The exposure-to-next-view path shows where time is lost after the image is taken. The technologist leaves the console, carries the cassette to the reader, waits for scanning, reviews the processed image at the workstation, and returns to reposition the patient before the next view. Trips and wait times separate cassette transport and reader processing from exposure time, image confirmation, and room reset.
Detector Size, Positioning Range, and Room Geometry
In our room review, we record patient size, standing and table views, wheelchair and bedside access, long-length imaging, dynamic or fluoroscopic requirements, detector mobility, room dimensions, ceiling height, floor space, power supply, cable paths, and clearance around the table or stand. Our UC-ARM and Lingxi systems can then be assessed against those site conditions, including the arm’s rotation envelope, confined-space maneuverability, one-handed operation, and 13-degree incline capability.
PACS and RIS Integration
For PACS/RIS, the issue is the information route between exposure and report. Patient matching, worklist retrieval, image transfer to PACS, annotation preservation, rejected-image handling, and reporting are checked at the workstation. A CR room may already connect to PACS/RIS, so the comparison focuses on the remaining delay and whether a DR workstation can reduce it.
AEC, Exposure Index, and Dose Feedback
AEC chamber selection, EI/DI display, collimation, calibration, backup timer operation, and repeat-image logging must match the room’s exam protocols. The facility also assigns responsibility for QA review, calibration records, and repeat-image trend follow-up after go-live.
Installation, Training, Calibration, and Service Support
A DR upgrade changes daily roles after the system is installed. We help the facility define how each team will work with the new system: technologists manage detector handling, positioning, protocol selection, rejected-image review, and exposure-feedback procedures; IT staff validate the PACS/RIS interface and reporting handoff; biomedical or service personnel maintain calibration records, preventive maintenance schedules, and response contacts.
CR to DR Upgrade Checklist
Use this RFQ checklist to describe the room, current CR workflow, planned examinations, PACS/RIS setup, and service expectations before requesting a configuration or quotation.
| RFQ input | What to share before quotation |
|---|---|
| Room role | Is the room mainly routine radiography, emergency, ICU/bedside, orthopedic, R/F, or outpatient? |
| Daily pressure | Daily exam count, peak-hour backlog, urgent cases, repeat images, and expected growth |
| CR delay point | Where time is lost now: reader distance, cassette trips, queue time, or delayed confirmation |
| Existing system | Generator, table/stand, room size, shielding, power, cable route, and usable clearance |
| PACS/RIS route | Worklist source, patient matching, storage destination, reporting route, rejected-image handling |
| Patient route | Wheelchair or bedside access, corridor and elevator limits, ICU/ward route, pediatric use |
| Imaging scope | Detector size, fixed/mobile use, standing/table views, long-length imaging, fluoroscopy, bedside work |
| Exposure control | AEC use, EI/DI review, pediatric protocols, calibration records, backup timer, repeat-image review |
| Service expectation | Training users, calibration support, warranty terms, maintenance rhythm, response time, required documents |
FAQ About DR vs CR Systems
Can a facility keep CR in one room and use DR in another?
Yes, if each room has a clear role. The facility should assign exam types, worklist matching, image storage, reporting route, QA checks, and maintenance responsibility to each room, so CR and DR do not create two disconnected workflows.
Does upgrading to DR require replacing the whole X-ray system?
Not always. The existing generator, table or stand, power, shielding, room geometry, and software interfaces decide whether the room can be upgraded or needs full replacement. A room that already supports the target exams and positioning range may only need a detector, workstation, and integration package. Full replacement is more likely once the current system cannot support the required positioning, fluoroscopy, dynamic imaging, or integration route.
What should a DR supplier quote include?
A complete DR quote should make the upgrade scope clear, including room-fit assumptions, exclusions, buyer-side site work, and pre-installation requirements. This helps the facility compare suppliers on the real project scope.
How should a facility compare long-term cost between CR and DR?
Use one defined comparison period and apply it to the same examination mix. Include equipment, installation, service, consumables, downtime, staff time, repeat images, and delayed confirmation, then compare the cost per completed examination. This keeps cassette handling and reader-related time in the CR calculation while accounting for detector, integration, calibration, training, service, and repair costs on the DR side.
Conclusion
The checklist helps identify which rooms are slowed by CR handling, reader access, or reporting delays. Contact us with the findings, and we can help review whether each room should stay with CR, move through a phased DR upgrade, or be planned around a suitable DR configuration.